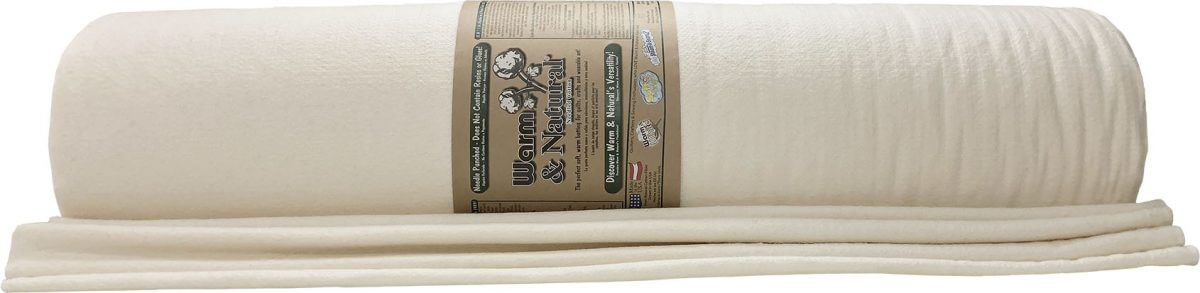
Warm & Natural is the preferred batting among quilters world-wide!
Warm & Natural is the finest needle-punched cotton batting! Only 15% of all cotton grown in the USA is the proper length, thickness and color. Out of this 15%, only 5% is clean enough for Warm & Natural! This soft, natural cotton has never been washed or bleached with harsh chemicals. It’s kinder to the environment and kinder to your batting. The cotton undergoes a mechanical cleaning process removing all of the seeds, seed coats, along with the majority of leaf and stem remnants. The remaining tiny plant particles lend a special look to crafts like no other and won’t harm your quilt.
Quilt or tie up to 10″ apart! Quilt Warm & Natural right out of the package, as pre-washing is not necessary. Once quilted, machine wash and dry your finished quilt in cold water. 3% shrinkage can be expected in the first wash with cold water. To achieve an antique puckered look use warm water for 5% shrinkage. Warm & Natural won’t distort when hanging, hooping or when used in quilt frames. It can be used for both batting and as an exterior craft fabric to create stuffed snowmen and rabbits.
The Warm Company is proud to purchase over 4 million pounds of American cotton annually for processing in our American manufacturing facilities by American workers for the American tradition of quilting shared around the world!
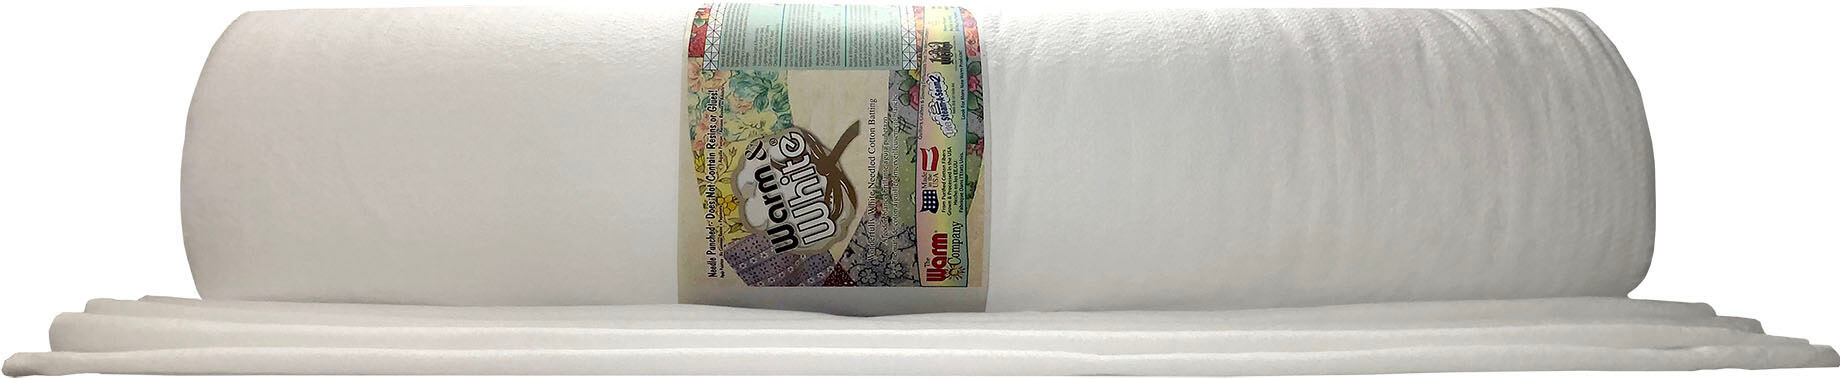
Warm & White is the ideal batting for pastel and tone-on-tone fabrics!
Warm & White is The Warm Company’s second highest selling quilt batting enjoying world-wide success for 30 years. Warm & White is everything you love about Warm & Natural with beautiful whitened cotton fibers! The natural cotton fibers undergo a hydrogen peroxide bath to remove all the impurities as well as the natural color. This safe process leaves the fiber soft and hypoallergenic. The fiber is processed in the same state of the art needle-punched tradition that made Warm & Natural the most highly regarded quilt batting in the world. Warm & White is the ideal batting for use with bright white, pastel, and tone-on-tone fabrics because Warm & White won’t peek through! Of course the bright white batting lends itself to soft sculpture snowmen, polar bears and rabbits.
Both Warm & Natural and Warm & White weigh 4 oz. per square yard, but Warm & White feels a little thinner due to the cleaning process. There is little to no measurable shrinkage in a cold or warm water wash after quilting. When looking for a finished quilt that will remain pristine without puckering around your quilted lines, Warm & White is the perfect choice!
Benefits of Needlepunch Batting
Will Not Separate or Bunch
Contains No Resins or Glues
Will Not Shift, Migrate or Beard
Quilt or Tie Leaving up to 10″ Open
Once Quilted, Machine Wash & Dry
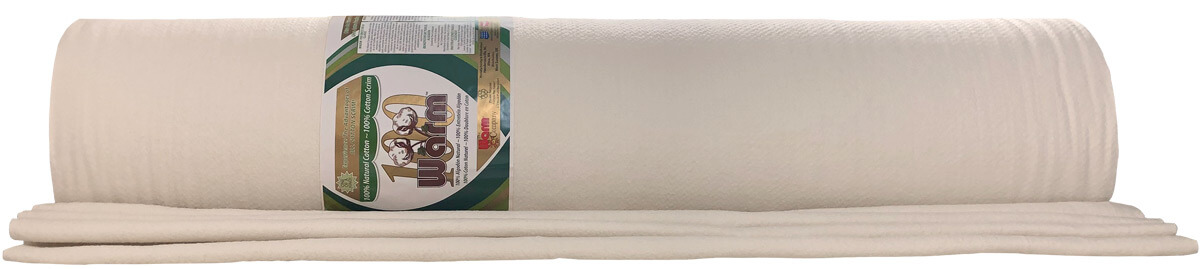
Warm 100 – 100% Cotton Batting with 100% Cotton Scrim!
Warm 100 is a premium, all-natural cotton batting crafted for quilters who value softness, stability, and ease of use. Made with 100% natural cotton fibers needle-punched into a 100% cotton scrim, Warm 100 offers a breathable, low-loft finish that delivers consistent performance in both hand and machine quilting.
Our state-of-the-art mechanical cleaning process removes seeds and plant remnants—preserving the natural purity of cotton without the use of harsh chemicals, glues, or resins. The all-cotton scrim holds the fibers securely together, making Warm 100 incredibly soft, easy to handle, and resistant to shifting, bunching, or bearding during the quilting process.
You can quilt or tie up to 10″ apart, giving you flexibility to create with confidence whether you’re crafting a baby quilt, a full-sized heirloom, or a detailed wall hanging.
Warm 100 is ideal for quilters who prefer an all-natural fiber experience, from inside to out.
Key Features:
110” Width – Bigger Queen Size – 90” x 110” & Bigger Baby Size – 55” x 60”
Weight: 4 oz per square yard
Easy to Quilt by Hand & Machine
Breathable Cotton Warmth with Low Loft
No Prewash Necessary < 3% Shrinkage
Zero Glues or Resins – No Chemical Smell
Top & Backing Fabrics Cling While Quilting
Will Not Separate or Bunch
Will Not Beard – Shift or Migrate
Quilt or Tie Leaving Up To 10” Open
Once Quilted, Machine Wash Cold & Dry
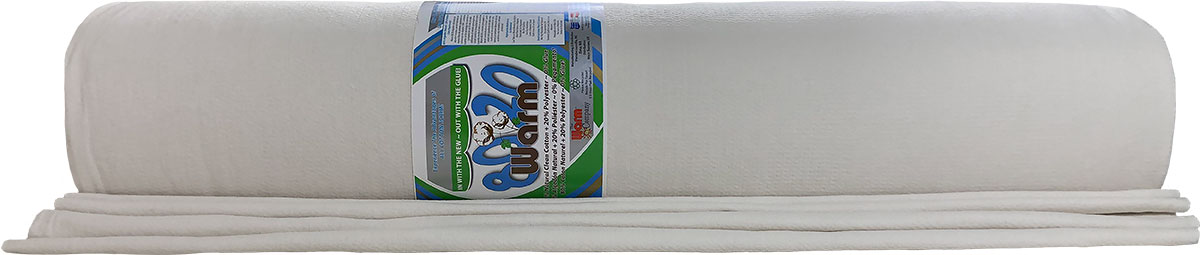
80% Natural Clean Cotton + 20% Polyester – Zero Glue!
Warm 80/20 is completely clean, natural cotton fiber blended with new pillow-soft, resilient polyester fibers, evenly layered and needle punched into a lightweight, stable 100% cotton scrim. The Warm Company’s state of the art manufacturing is newer technology versus the 50+ year old resin bonding method using sprayed glue. Glue breaks down when washed leaving nothing to secure the fibers. The 100% cotton scrim holds the fiber permanently in place allowing quilting and ties to be up to 10” apart. Your quilting experience is soft with no chemical odor. Plus, you’ll have peace of mind when wrapping up baby in a Warm 80/20 quilt and no worries when it ends up in their mouth! While you keep centuries old quilting traditions going, The Warm Company will keep manufacturing the most innovative quilting and crafting products!
Modern Manufacturing Makes The Difference!
Made Without Glues – No Chemical Odor
Finish Quilts Quickly – Quilt or Tie Up to 10“ Apart
Fabric Clings to Batting While Quilting
Will Not Separate or Bunch
No Pre-Wash – 3% Shrinkage in First Cold Wash
Once Quilted, Machine Wash & Dry
Won’t Distort When Hanging or Hooping
Ideal For Use In Rag Quilts & Tie Quilts
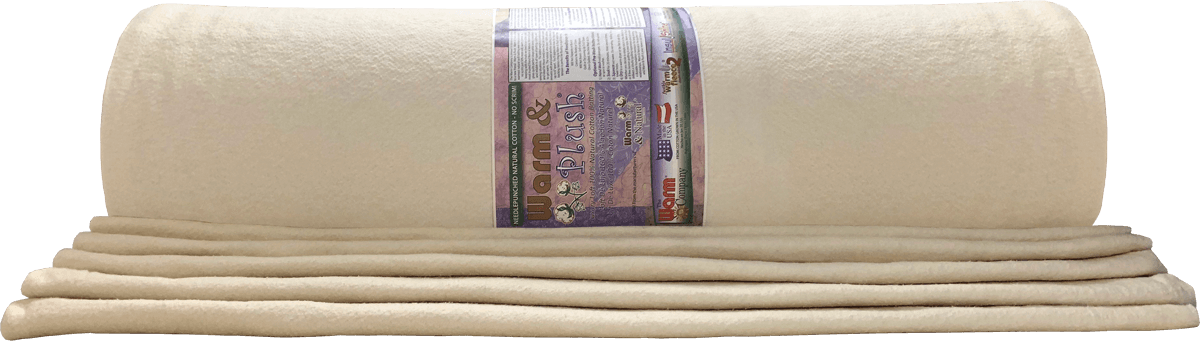
100% Extra Clean Cotton – No Scrim
Warm & Plush is the warmest natural batting ever manufactured; it has no scrim, just 50% more soft, warm cotton fiber! In keeping with The Warm Company tradition, Warm & Plush gives quilts perfect drape while being consistent and reliable in all types of quilting, crafting and sewing situations. The added weight is ideal for those loved ones that can never seem to get warm! The 100% super clean cotton remains soft and pliable whether quilting is close or up to 6″ apart. Warm & Plush has the perfect tension for floating in quilt frames. Whether you decide to stitch in the ditch, tie or free motion quilt, Warm & Plush delivers a blissful quilting experience and provides the durable foundation necessary for long lasting relationships. Warm & Plush is your newest old friend, perfect for use in projects calling for 100% cotton batting. Top and backing fabrics cling to Warm & Plush. Basting spray is not recommended for use with Warm & Plush, as repositioning the top and bottom fabrics will pull apart the cotton.
Benefits of Needlepunch Batting:
Will Not Separate or Bunch
Contains No Resins or Glues
Will Not Shift, Migrate or Beard
Quilt or Tie Leaving up to 6″ Open
Once Quilted, Machine Wash & Dry
The Warm Company does not recommend using Warm & Plush or any Warm product in the microwave. Cotton is not fire retardant and has not been treated to be flame resistant. Using cotton in the microwave may result in fire.
Sew-In Warm Fleece Adds Loft & Dimension to Crafts
Sew-In Warm Fleece sets a new standard for polyester fleece—crafted using the softest, highest-quality 100% polyester fibers made in the USA. With state-of-the-art manufacturing and a 6 oz loft, it adds gentle shape, dimension, and stability to a wide variety of sewing, quilting, and crafting projects.
You’ll notice the difference right away—from the incredibly soft feel to the consistent structure that enhances both the look and durability of your finished pieces. Whether you’re working on home décor or wearable art, Sew-In Warm Fleece delivers reliable performance with a clean finish.
Ideal for projects that require interlining or padding, including placemats, table runners, wall hangings, baby bibs, picture frames, holiday decorations, totes, purses, jackets, and vests. It won’t shrink, lose its shape, or distort over time, making it a worry-free addition to your creative toolbox.
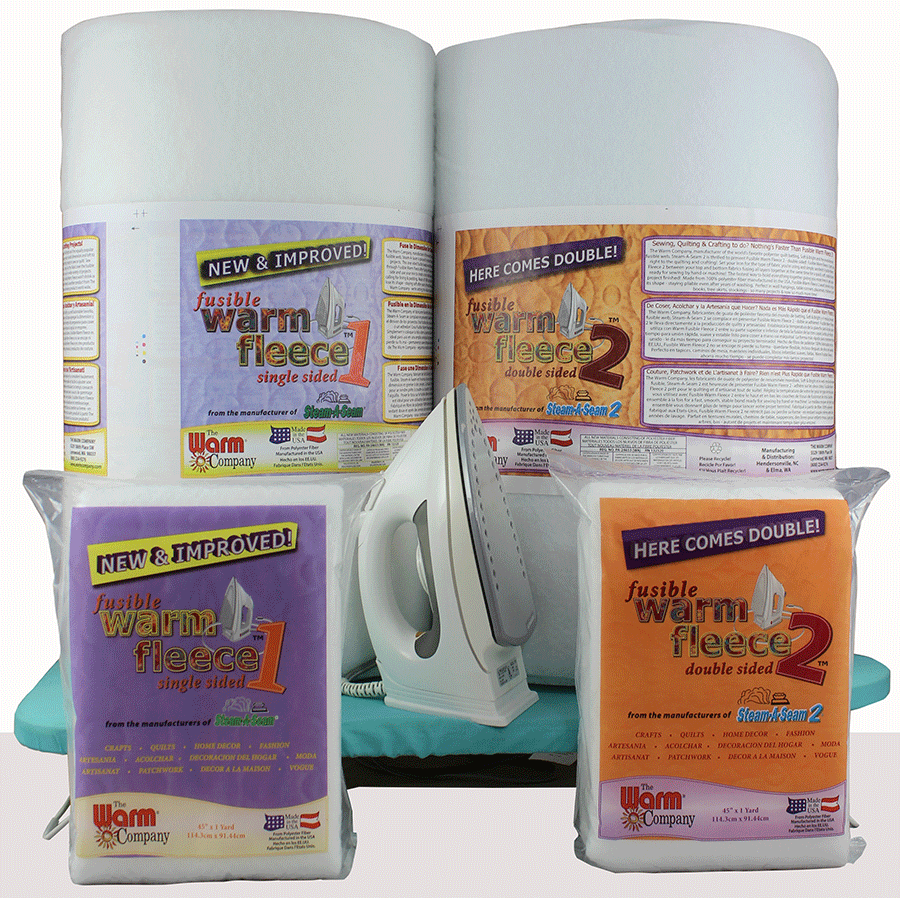
Fuse In Dimension For Sewing, Quilting and Crafting Projects!
The Warm Company, manufacturer of the world’s favorite polyester quilt batting, Soft & Bright and the equally popular fusible web, Steam-A-Seam is pleased to present Fusible Warm Fleece – the quick, easy way to add dimension and loft to projects. Fusible Warm Fleece 1 keeps everything together reducing time spent getting ready to sew or quilt! Sew through Fusible Warm Fleece after fusing without worry of gumming your needle. Simply lay the fabric over the fusible side (the rougher feeling side) and use your iron to create a nice stable bond. Made of 100% polyester fiber manufactured in the USA, Fusible Warm Fleece won’t shrink or lose its shape – staying soft after years of machine washing and drying. Fusible Warm Fleece 1 features Steam-A-Seam 2 on one side of the Warm Fleece allowing you to quickly fuse either your top or backing fabric eliminating the need for basting. Quickly line a tote or apply the backing to placemats, table runners and wallhangings. Fusible Warm Fleece 1 is extremely versatile in that a quick, gentle pass of your steam iron will create a permanent soft, pliable bond ideal for soft books but the more steam and pressure you apply makes it very rigid for stand up totes!
Fusible Warm Fleece 1 Instructions:
Set your iron for the type of fabric you will fuse – steam on.
Lay the Fusible Warm Fleece 1 fusible side up on your ironing surface and place your fabric right side up on top making sure the Fusible Warm Fleece 1 is not exposed to your iron – this could get messy!
Gently pass the steam iron in one direction across the layers from one side to the other lifting the iron as you come to the end and replacing at the starting side again slightly overlapping making sure all areas have been steamed. If a soft fuse is what you need, you’re done!
Repeat step 3 with pressure as many times as needed to reach your desired rigidity.
Fusible Warm Fleece 2 gets you right to quilting and crafting!
Simply sandwich Fusible Warm Fleece 2 between top and bottom fabrics – fusing all layers together at the same time for a quick, soft and stable bond ready to sew by hand or machine. The great time saving way to add loft, dimension and stability to quilting, crafting and sewing projects. Recommended by the most popular designers for reliable quality. If you’re looking for a thin more rigid finish just press down and steam for the desired consistency. If softness is desired a quick pass is all it takes!
Fusible Warm Fleece 2 Instructions:
Set your iron for the type of fabric you will fuse. If using two different types of fabric simply split the difference between the two temperatures – steam on.
Sandwich Fusible Warm Fleece 2 between your top and bottom fabrics making sure the Warm Fusible Fleece 2 is not exposed to your iron – this could get messy!
Gently pass the steam iron in one direction across your sandwich from one side to the other lifting the iron as you come to the end and replacing at the starting side again slightly overlapping making sure all areas have been steamed. If a soft fuse is what you need, you’re done!
Repeat step 3 with pressure as many times as needed to reach your desired rigidity.
Too Hot to Handle? Too Cold to Hold? Make It Just Right with
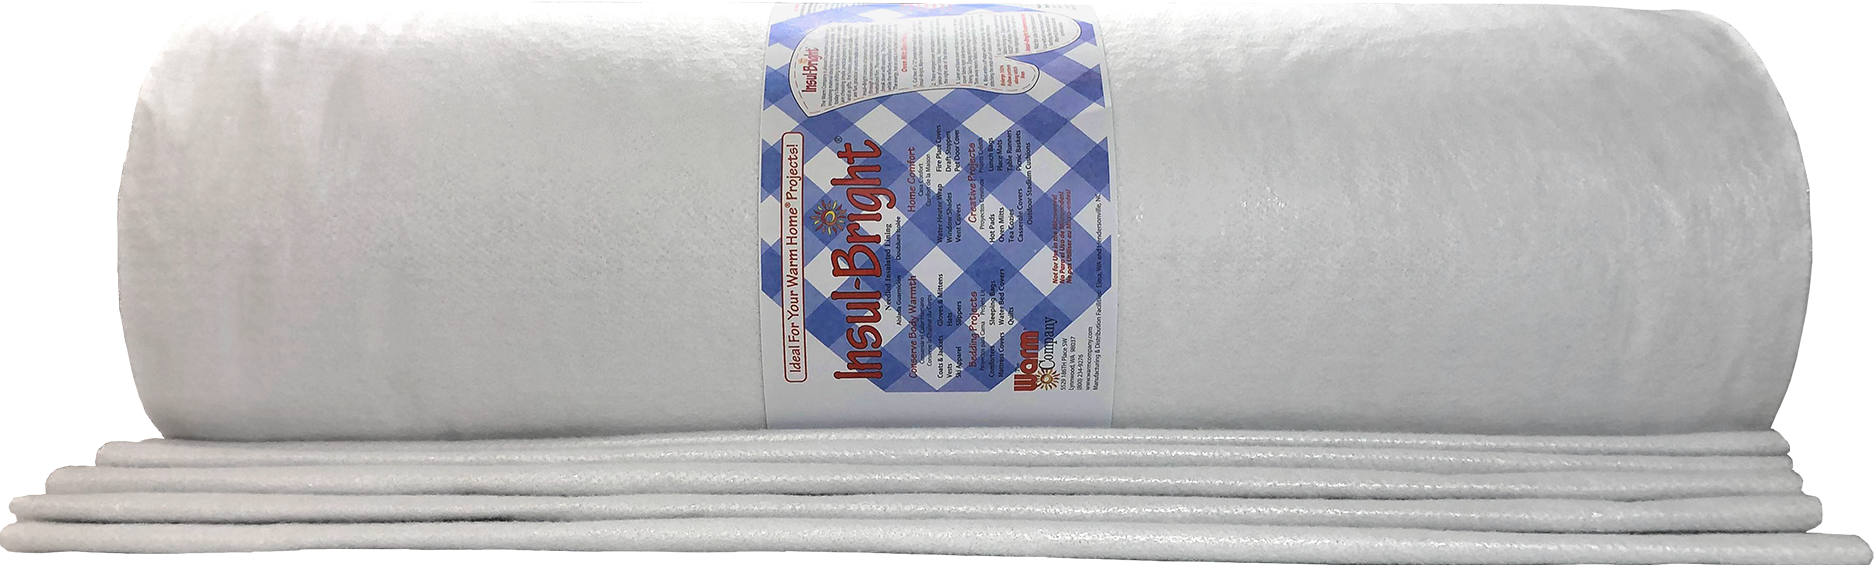
Insul~Bright puts the FUN in functional! With today’s focus shifting back to family and home, new and experienced crafting and sewing enthusiasts are choosing simple, practical projects for use in their homes and as gifts. Pot holders, oven mitts, soft lunch sacks and casserole covers are simple, quick projects made functional and safe with Insul-Bright. US manufactured polyester fibers are needled through a reflective metalized polyester film. The needled material is breathable and won’t break down with washing. The polyester fibers resist conduction while the reflective metalized polyester film reflects radiant energy, hot and cold, back to its source.
Insul~Bright is not recommended for microwave use. Insul-Bright’s metalized film makes a crinkly sound that is very attractive to babies and animals lending itself to soft books and toys for your pet but it’s kind of noisy for clothing.
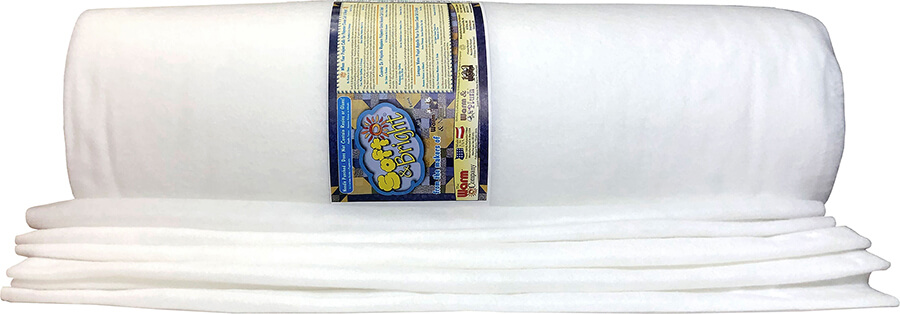
Soft & Bright is the most trusted polyester batting world-wide!
Soft & Bright undergoes the same manufacturing process that has made Warm & Natural, the world’s leading batting. Soft & Bright consists of premium grade polyester fibers, needle-punched into a strong paper thin base material that holds the fibers in place, keeping the batting even and consistent. The high quality polyester fiber is soft and fluffy to the touch. The evenly layered fibers of Soft & Bright will stay in place inside your quilt and Soft & Bright will keep its shape even after a lifetime of gentle washings. The thin base material holds the fiber in place preventing slipping making free motion quilting a breeze! Top and backing fabric will cling to Soft & Bright as it is fed through your machine, making basting spray a thing of the past. Soft & Bright can be quilted or tied up to 10″ apart so you can finish quilts even faster! Confidently use Soft & Bright in a hoop for embroidery and hand quilting without worry of distorting. Machine wash and dry finished quilts without any shrinkage. Soft & Bright is preferred for use in children’s quilts as they require more frequent washing and Soft & Bright quilts dry so quickly.
Get Stuck on Fabric Fusing!
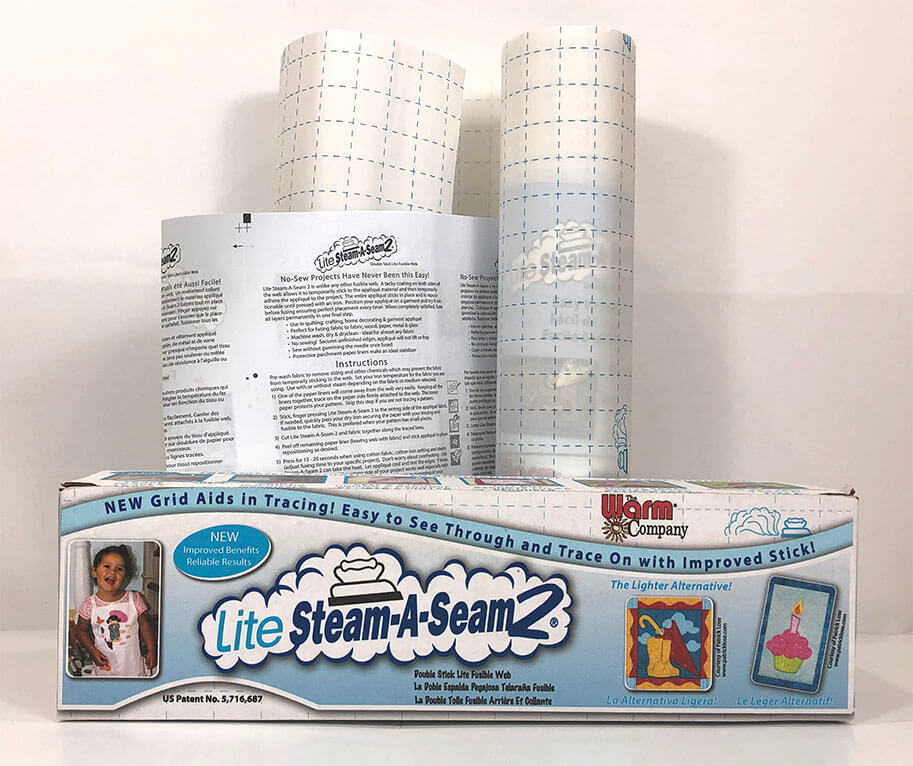
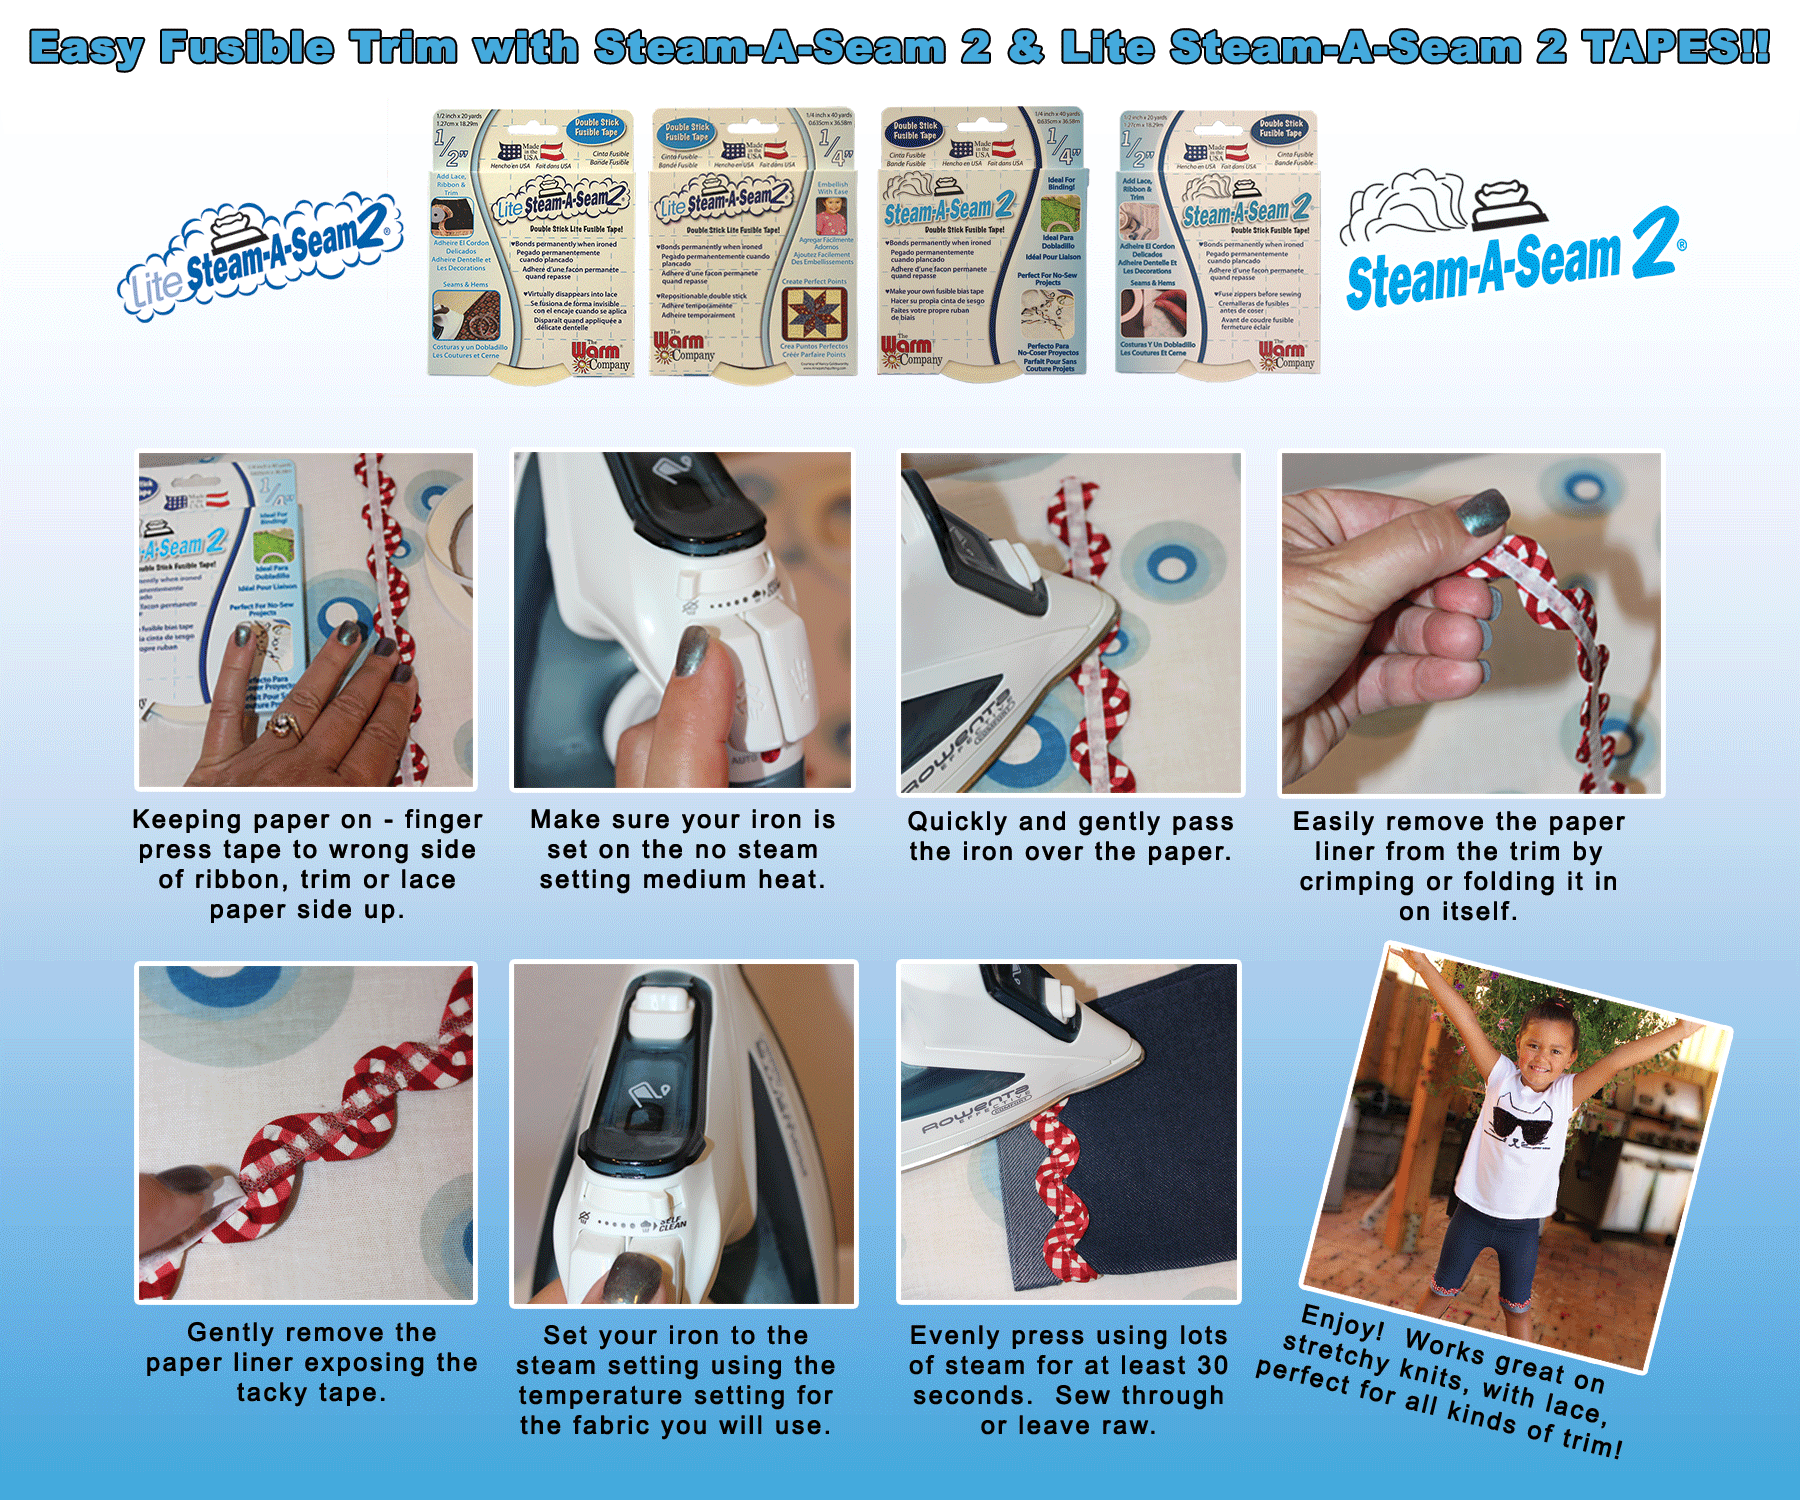
Lite Steam-A-Seam 2 is half the weight of regular Steam-A-Seam 2 making it ideal for use with the lightest fabrics and for creating multiple layer appliqué on quilts and clothing. Popular designers, authors and teachers recommend Lite Steam-A-Seam 2 by name earning it the most highly regarded reputation for quality world-wide. Lite Steam-A-Seam 2 offers a repositionable, temporary stick and when fused creates a soft permanent bond. Use with or without sewing machine washable, dryer safe, and even dry cleanable – Lite Steam-A-Seam 2 will stick with you! View or download step by step instructions here: SAS2 – LSAS2 Instruction Sheet
Available By The Bolt:
12″ x 40 YD | 18″ x 25 YD | 24″ x 25 YD Available In 3 Yard Boxes:
12″, 18″ & 24″ x 3 YD Packs 12 per case Tapes: 1/4″ x 40 YD – 12 per case | 1/2″ x 20 YD per case Sheets: 9” x 12” – 5 Sheets per pack – 24 packs per case
Double Stick Benefits:
Re-positionable stick;
Bond is strong & permanent;
Leave edges unfinished – will not fray or lift;
Will not gum up your needle;
Machine wash and dry (See Product Care)
Easy to Use
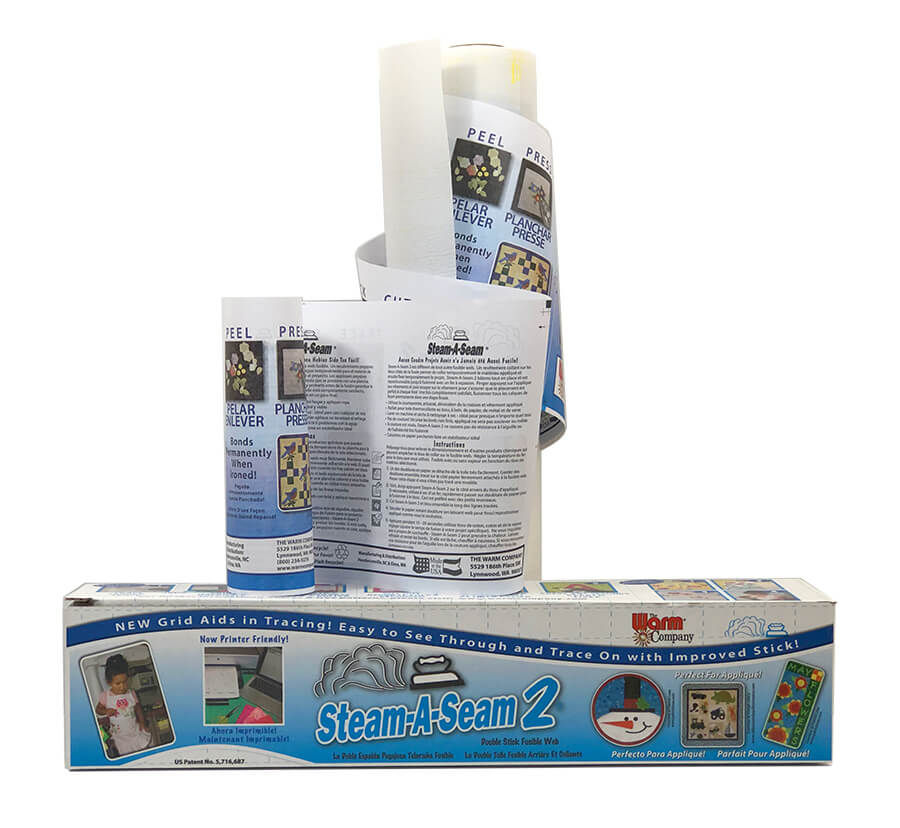
New grid paper aids in tracing
Easy to see through and write on
Now printer friendly!
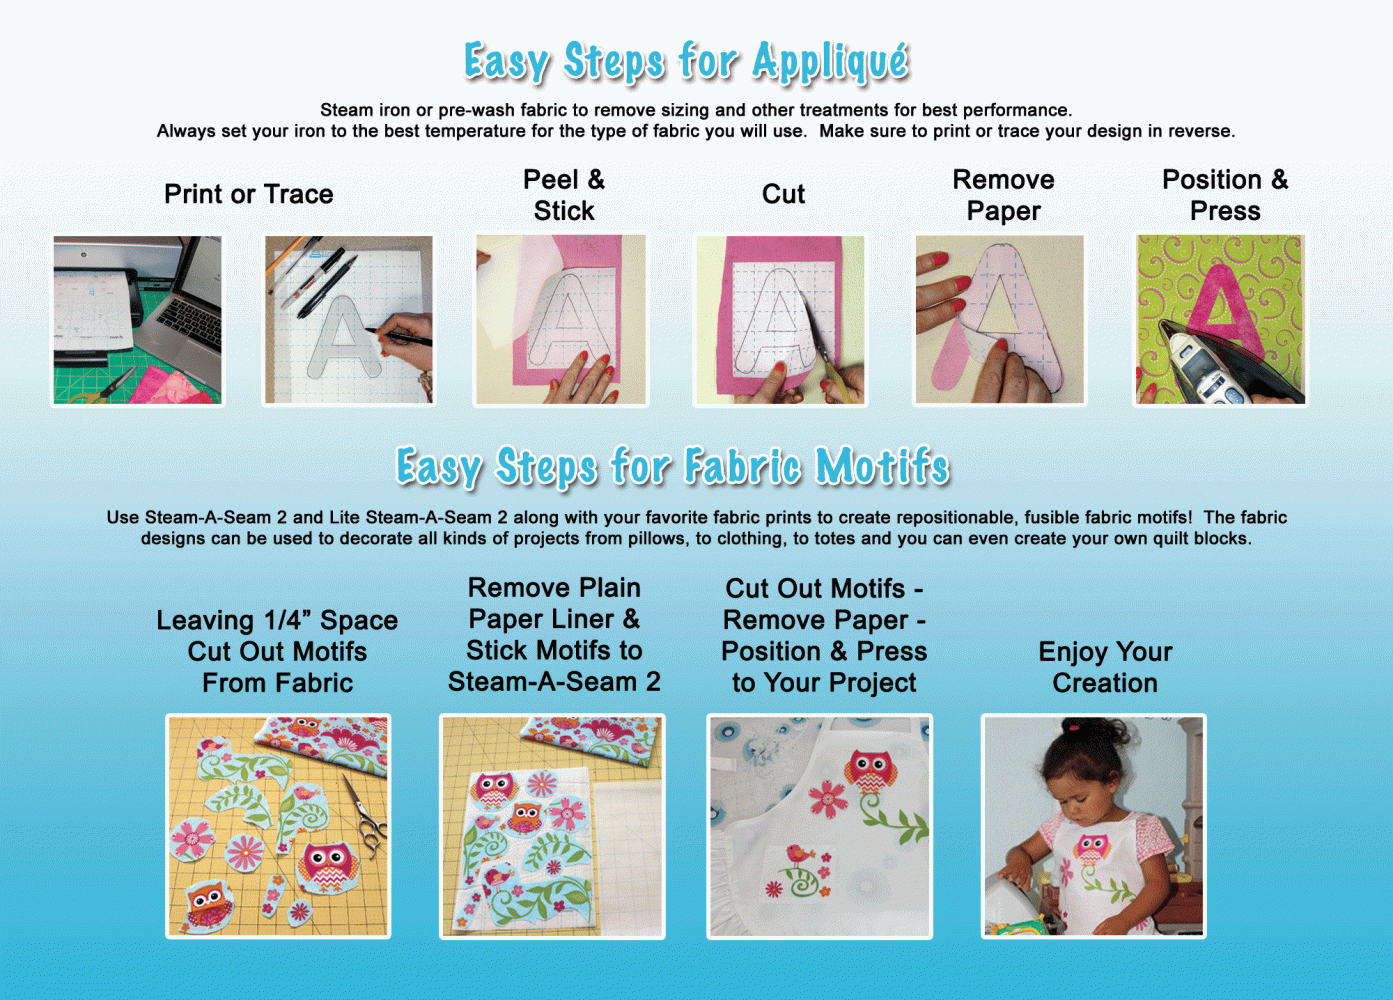
Use Steam-A-Seam 2 with different materials & projects:
Appliqué
No-Sew hems & seams
Add or repair zippers, pockets, etc.
Apply lace, ribbon & embellishments
Durable enough to use with paper, cardboard, wood, glass, etc!
Get Stuck on Fabric Fusing!
The #1 most loved brand of double stick fusible web, Steam-A-Seam 2 makes appliqué easy and fun!! Steam-A-Seam 2 is a heat activated pressure sensitive fusible webs. This makes the web tacky and repositionable for easy placement of your appliqué giving you the ability to position and reposition your design before permanently ironing.
You’ll never make a mistake – the last step is to fuse when everything is perfectly in its place! Before fusing, tack your project to a wall or try on a garment to check appliqué placement; you’re able to reposition pieces while you’re wearing them.
Available By The Bolt:
12″ x 40 YD | 18″ x 25 YD | 24″ x 25 YD Available In 3 Yard Boxes:
12″, 18″ & 24″ x 3 YD Packs 12 per case Tapes: 1/4″ x 40 YD – 12 per case | 1/2″ x 20 YD per case Sheets: 9” x 12” – 5 Sheets per pack – 24 packs per case
Benefits of Using Steam-A-Seam®:
Repositionable stick
Bond is strong & permanent
Leave edges unfinished – will not fray or lift
Will not gum up your needle
Machine wash and dry (See Product Care)
So Easy to Use and introducing New Benefits:
New grid paper aids in tracing
Easy to see through and write on
Now printer friendly!
Use Steam-A-Seam 2 with different materials & projects:
Appliqué
No-Sew hems & seams
Add or repair zippers, pockets, etc.
Apply lace, ribbon & embellishments
Durable enough to use with paper, cardboard, wood, glass, etc!
Tips for Using Steam-A-Seam 2 with Wool
To use Steam-A-Seam 2 or Lite Steam-A-Seam 2 with wool, or any dense and sensitive material, you need to iron press both the front and back of your design. If available, using a steam iron is recommended. Since the “wool” iron setting is a low temperature, you must iron press for a longer amount of time, until the Steam-A-Seam webbing is properly fused. Please use caution as it is possible to burn wool fibers – do not iron press in one area for too long. Press for 45+ seconds and let it set to cool.


 80% Natural Clean Cotton + 20% Polyester – Zero Glue!